Squaring the Square
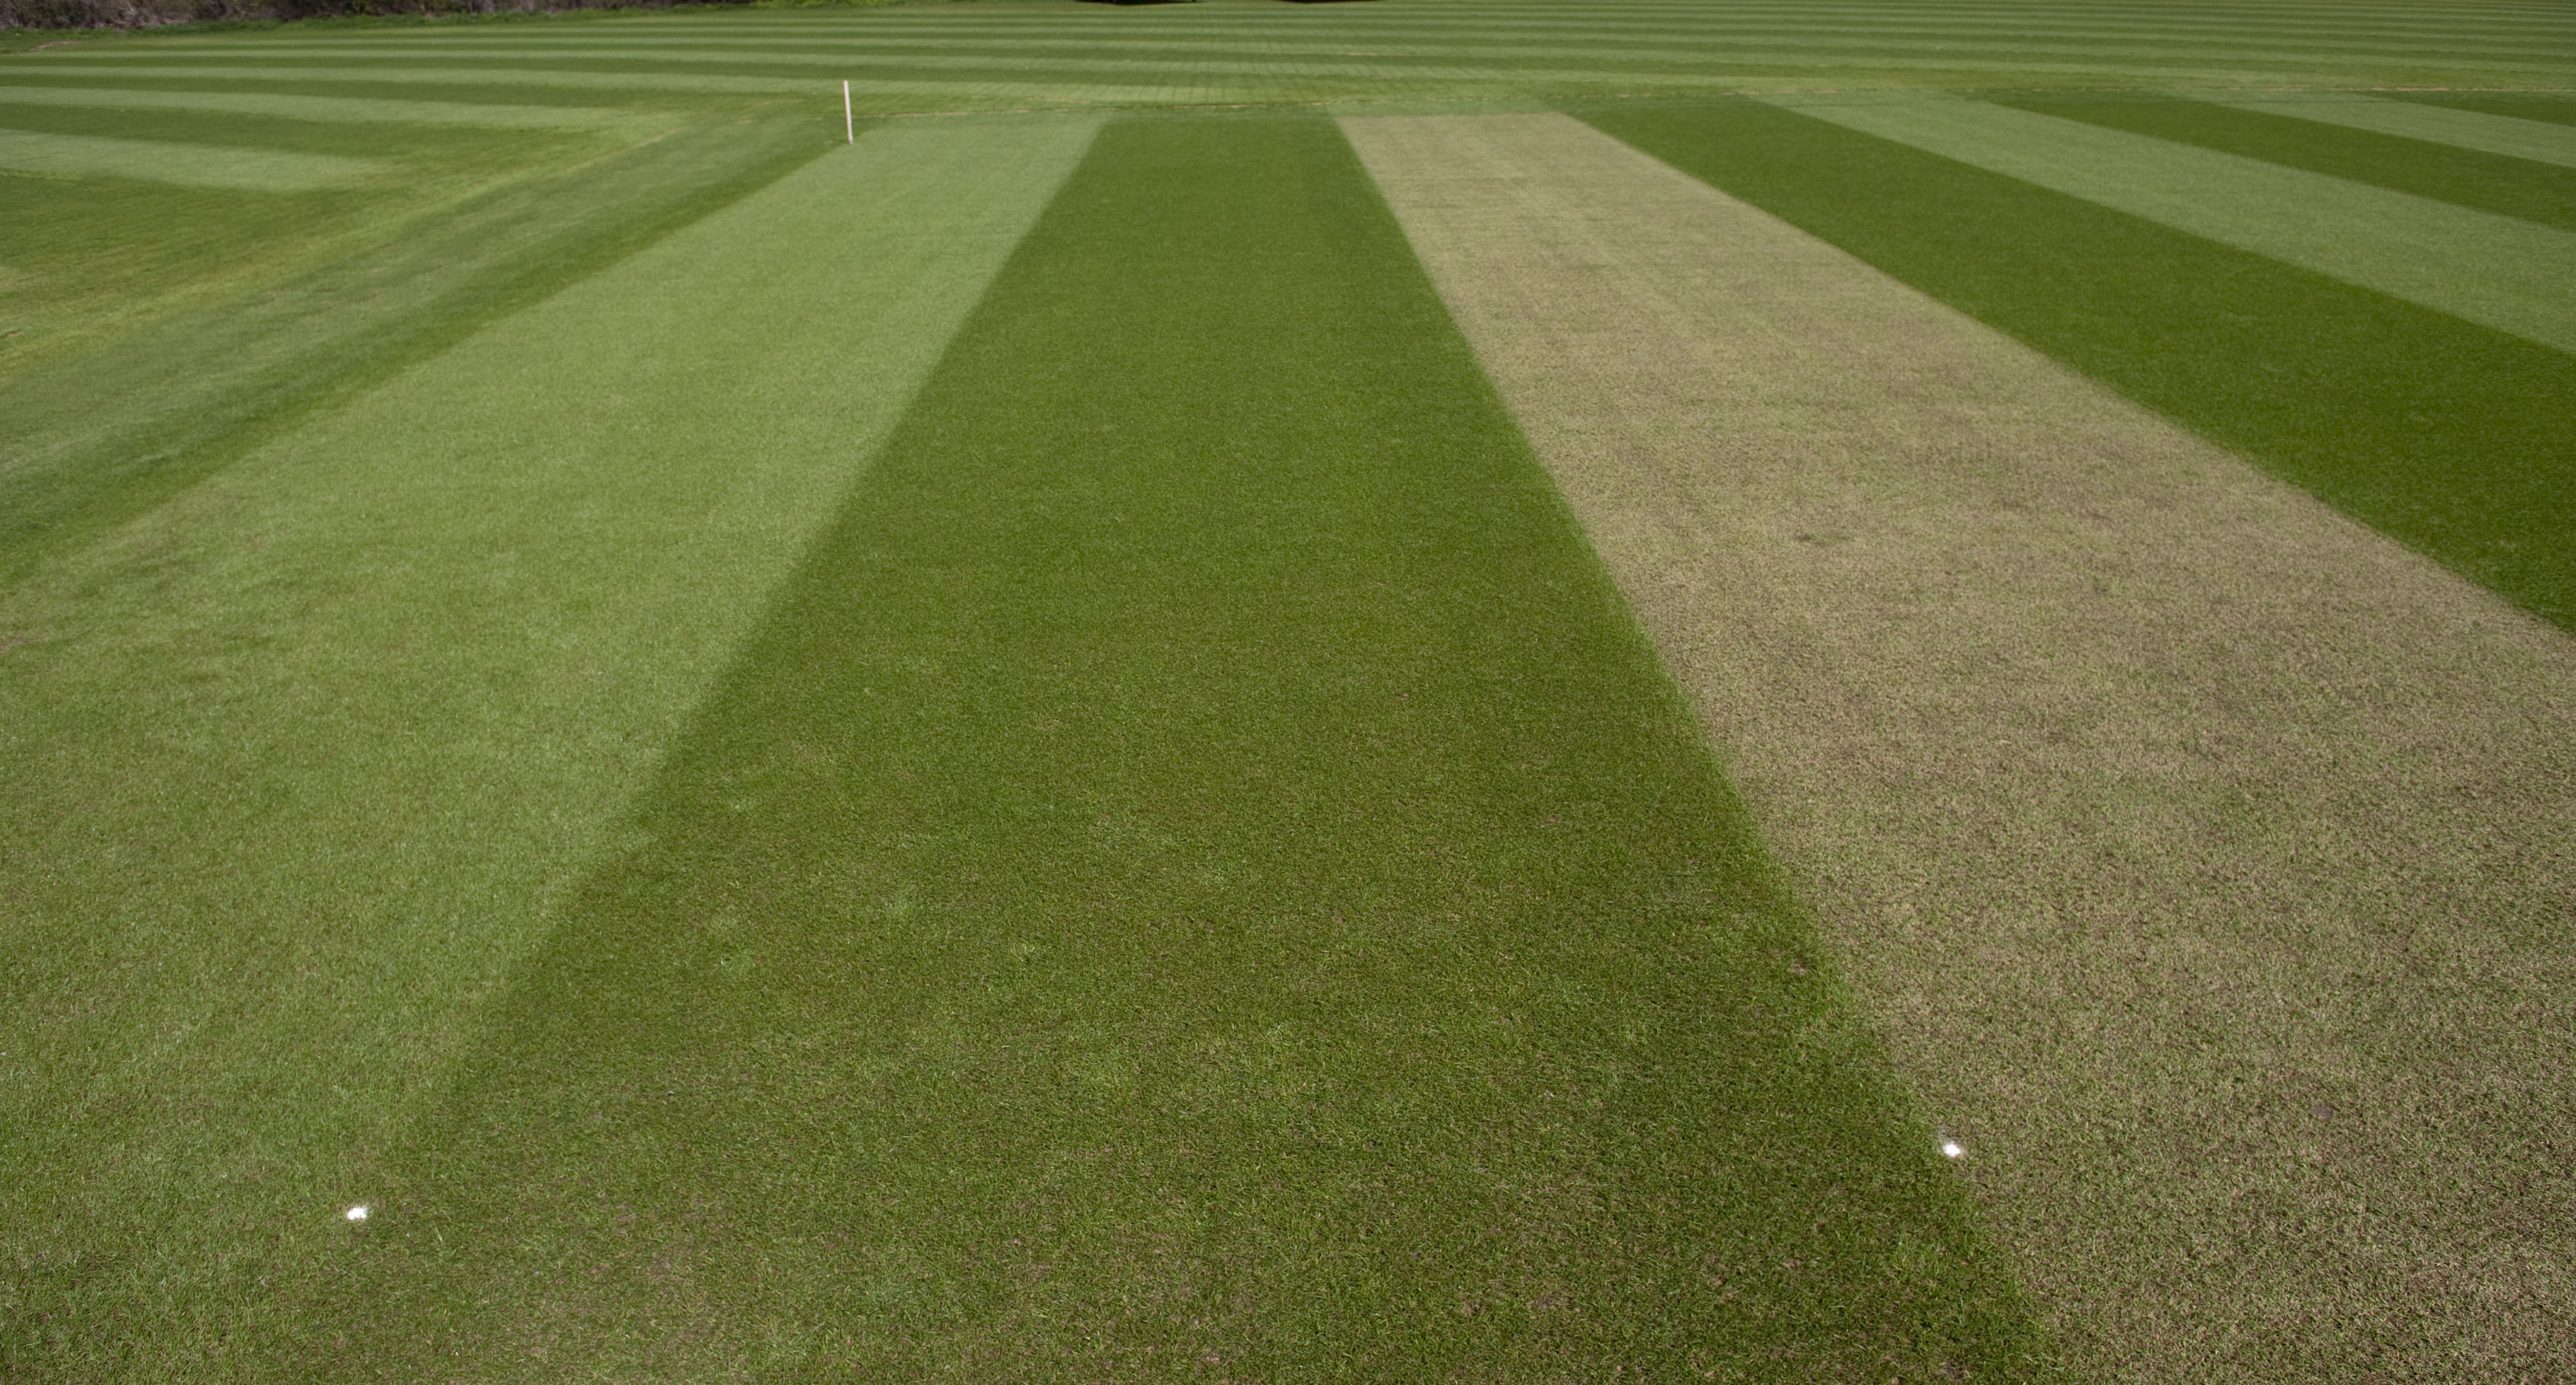
Prior to the season beginning (March and April).and the first pitch being prepared, it is important to ensure that the square is indeed square and that the individual pitch positions are marked out and are 22 yards in length in order to establish the true stump lines.
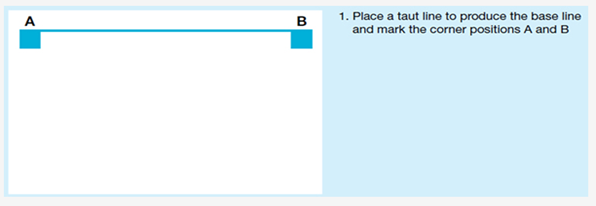
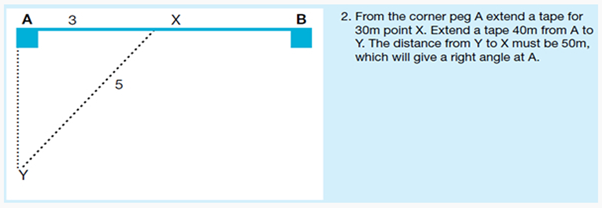
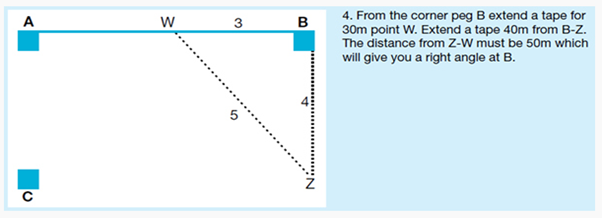
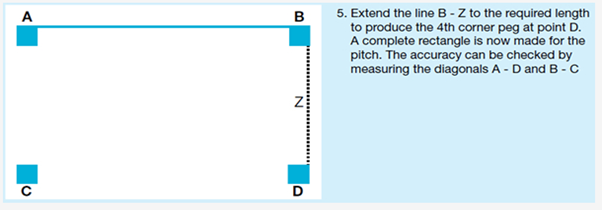
This should be done using a 3,4,5 triangle or multiples of those numbers (i.e., 30, 40, 50. 66ft, 88ft, 110ft works well). The larger the measurements the more accurate you can be. The equipment needed will be two 50m tapes, pegs, string lines and marking material.
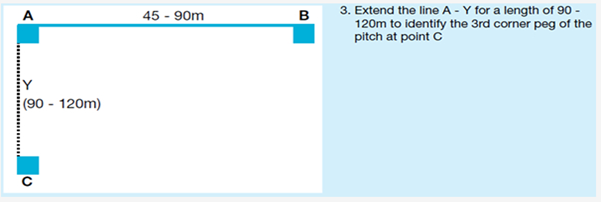
The aim is to establish four corner pegs 66ft (20.12m) apart down the length of a pitch and 10ft (3.05) across the line of play for each pitch on the square.
Various methods are used - some install short (100 mm long) sections of stump in the corners, with the top of the stump finished flush or a couple of mm below the level of the square. You can drill holes in the centre of the stumps so that you can insert pins/pegs for your string line to support marking out during the season.
Other methods include similar lengths of narrow diameter (e.g.10 mm) plastic pipe. If you have a large square, it may help to insert one or two markers at each end to help maintain straight lines and to avoid having to string full width every time you mark out.
Note that markers can move over time, so always check your lengths and that you are square at the beginning of every season (ideally after you are at least half way through your pre-season rolling).
Marking the Pitches
Once you have established your square corners, you can then string across the bowling crease line (stump line) and mark your pitch edges (with a small 75 mm x 75 mm 'T' shape), and if it helps, your pitch centres too (e.g. with a straight line). You will need to decide on your pitch widths.
Pitches are 10 ft (3.05 m) wide by law (see our guide to marking out pitches for play which includes pitch dimensions here), so a pitch spacing of 10 ft is most common. On smaller squares it is possible to mark pitches on 9 ft (2.74 m) centres - this will result in a 6 inch (150 mm) overlap of pitches but this rarely falls within the pitching area. Note that it is difficult to blend these overlap strips into your main pitch colour once you are going back over adjacent used pitches because of the way grass regrows.
Once you have your corners and pitches marked in, make sure you keep overmarking throughout the season - do this accurately as this will help with seting out your pitches accurately - but always double check your measurements before setting out and marking your pitches for play.
Benefits
• Take time to get this right as it will save time during the season.
• Ensures that all marked lines and pitches are parallel to each other
• Sets out all the pitches for the season
• Good practice for planning the use of all pitches
Practical Tips
• Ensure the tapes, strings and pegs are in good condition as cloth tapes stretch over time
• This job is best carried out with two people
• Use a weak solution of marking paint when marking arcs etc. The true positions can be marked in using a stronger solution once everything is correct.
• Periodically check the correct distances are being maintained through the season.
• Consider the use of permanent markers for the corners of the square, or even for individual pitch positions.
To watch the video for Squaring the Square - Click here

 Tweet
Tweet